01.02 Photogrammetry
Photogrammetry is a useful tool for capturing 3D geometry and visual texture information from the real physical world. Photogrammetry software uses multiple 2D images takes from different yet overlapping angles to create a 3D mesh with textures. It is accessible with little more than a cell phone camera needed for compelling results. While purpose built, industrial photogrammetry rigs and workflows can achieve a high level of accuracy, general photogrammetry often produces stunning visual textures but potentially underwhelming 3D geometry. To achieve the highest physical detail and most accurate 3D model from the real world, 3D scanning is recommended.
Photogrammetry Best Practices
- Fill the camera frame with the object to efficiently use the available camera resolution. This give more photographic data to work with as well as reduces processing of pixels from the background that are not part of the scan
- Overlap photos by 60% - 70% for good scan coverage
- Keep the object in focus. Ensure that the aperture of your camera is small enough to have a wide depth of field. A high F-stop such as F-22, which has a small aperture, will give a deep depth of field.
- Keep the same focus setting, don’t change the focus if possible
- Keep a wide depth of field, or a larger section that is in focus. In general for the same camera aperture a wider depth of field is possible the farther aay the object and focal plane is from the camera
- Avoid changing the zoom on the camera since it will create calculation errors, keep the zoom fixed across all photos
- Use a high shutter speed to avoid blurry images
- Refer to basic camera settings for more information about setting up a camera for photogrammetry.
- Add multiple scale references. Lay down rulers, markers and other scale calibration devices near the object or location to scan. Make sure to capture the scale devices in detail so they can be used to tell the software what the real world scale and dimensions are. It is best to use long scale distances to improve accuracy. If you lay down a 2 meter measuring stick, then use the full 2 meters to set scale, rather than just a few millimeters or centimeters, even if the object is small.
- Never crop or transform images since this will confuse photogrammetry software reconstruction algorithms and produce poor results.
- You can either move the object with camera stationary or move camera and keep object stationary.
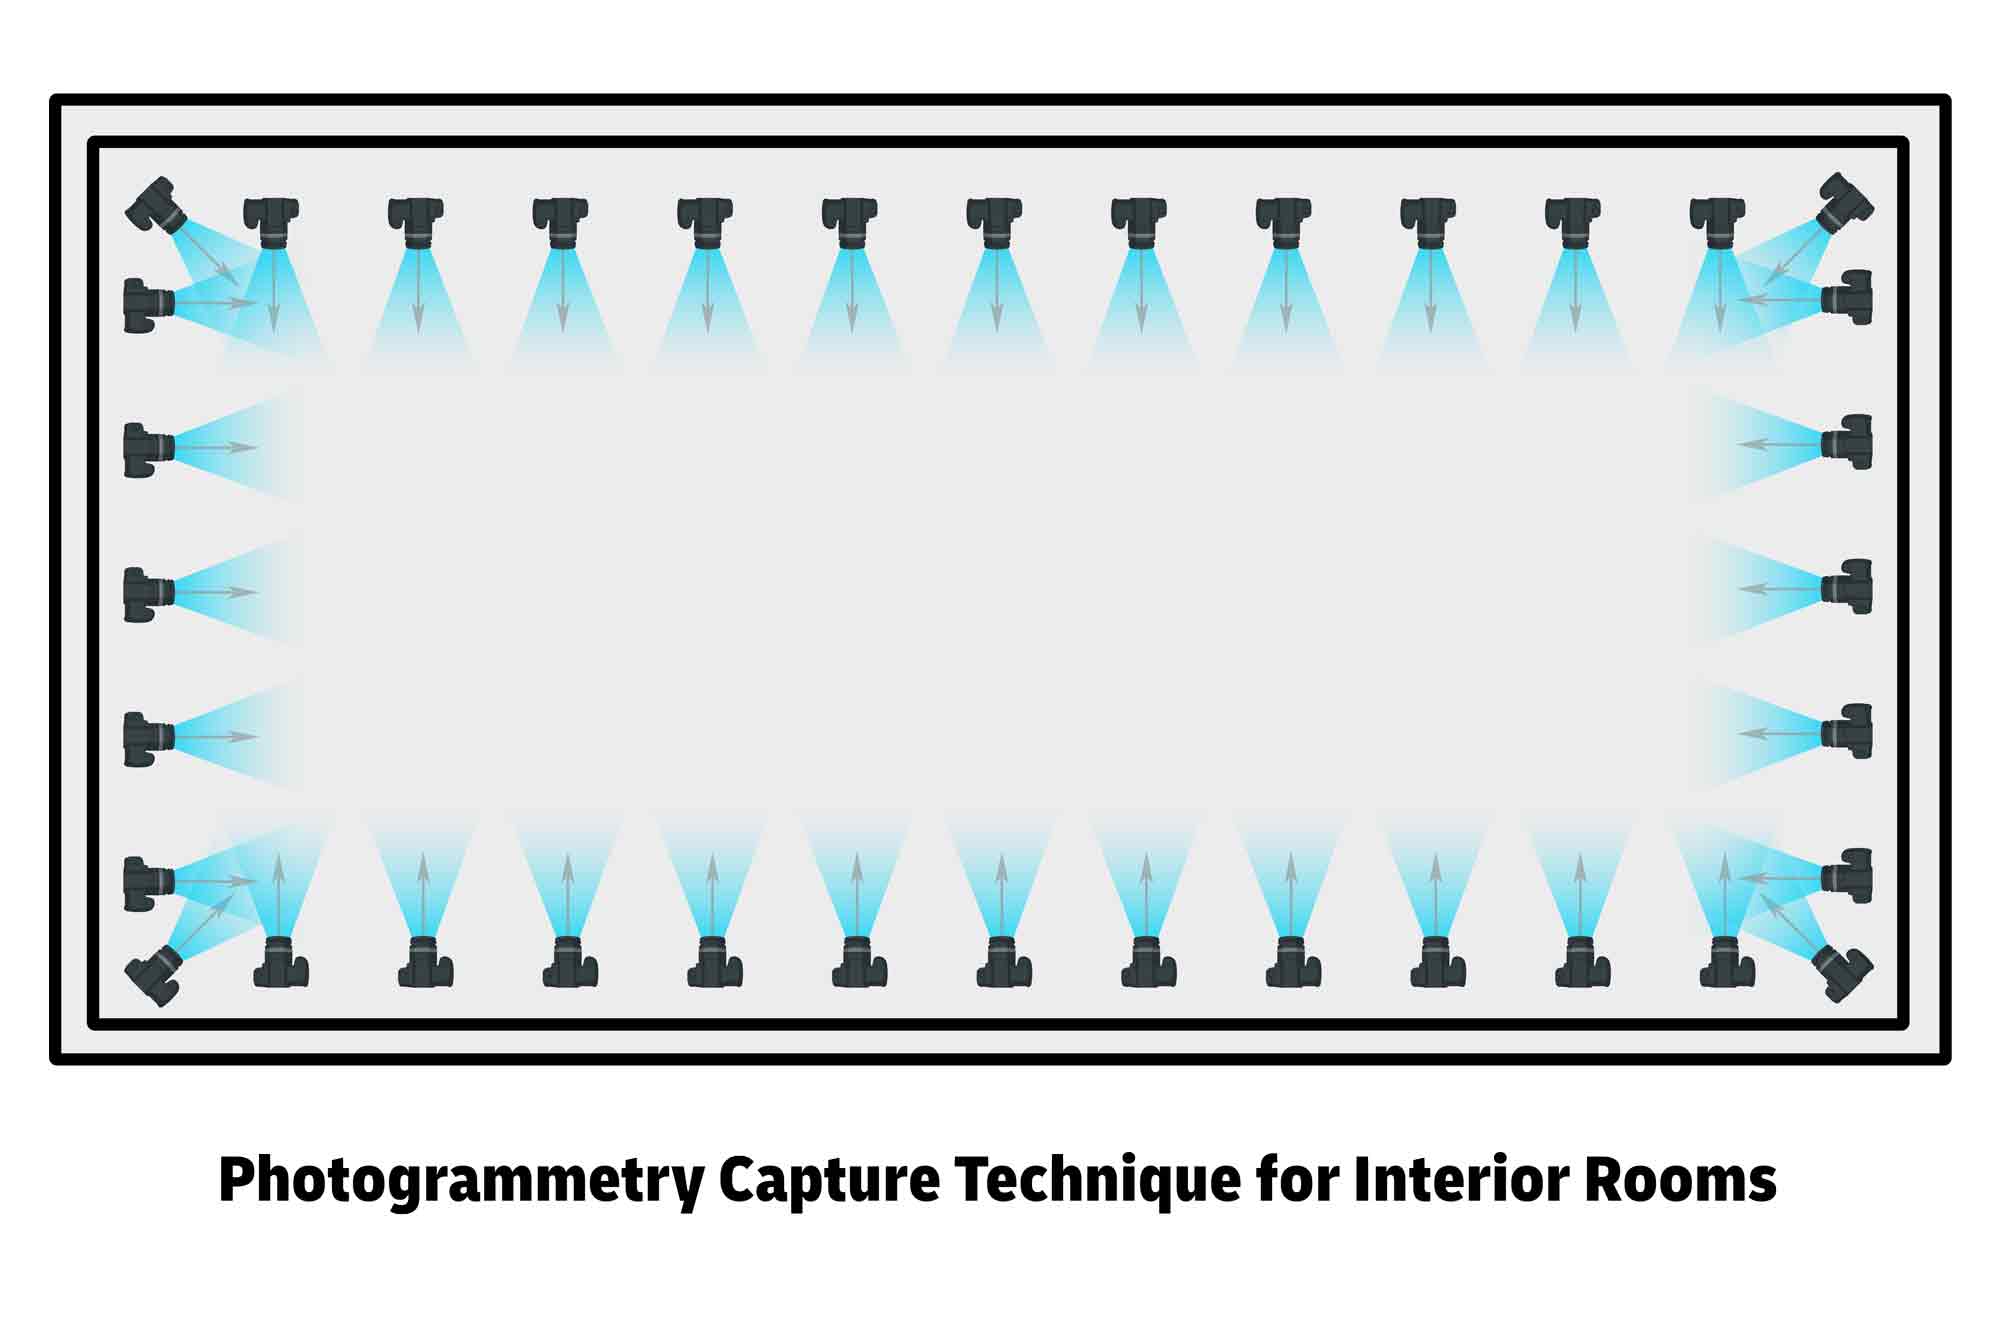
Shoot around the perimeter of an interior room toward the center. Keep the camera pointed perpendicular to the opposite wall.
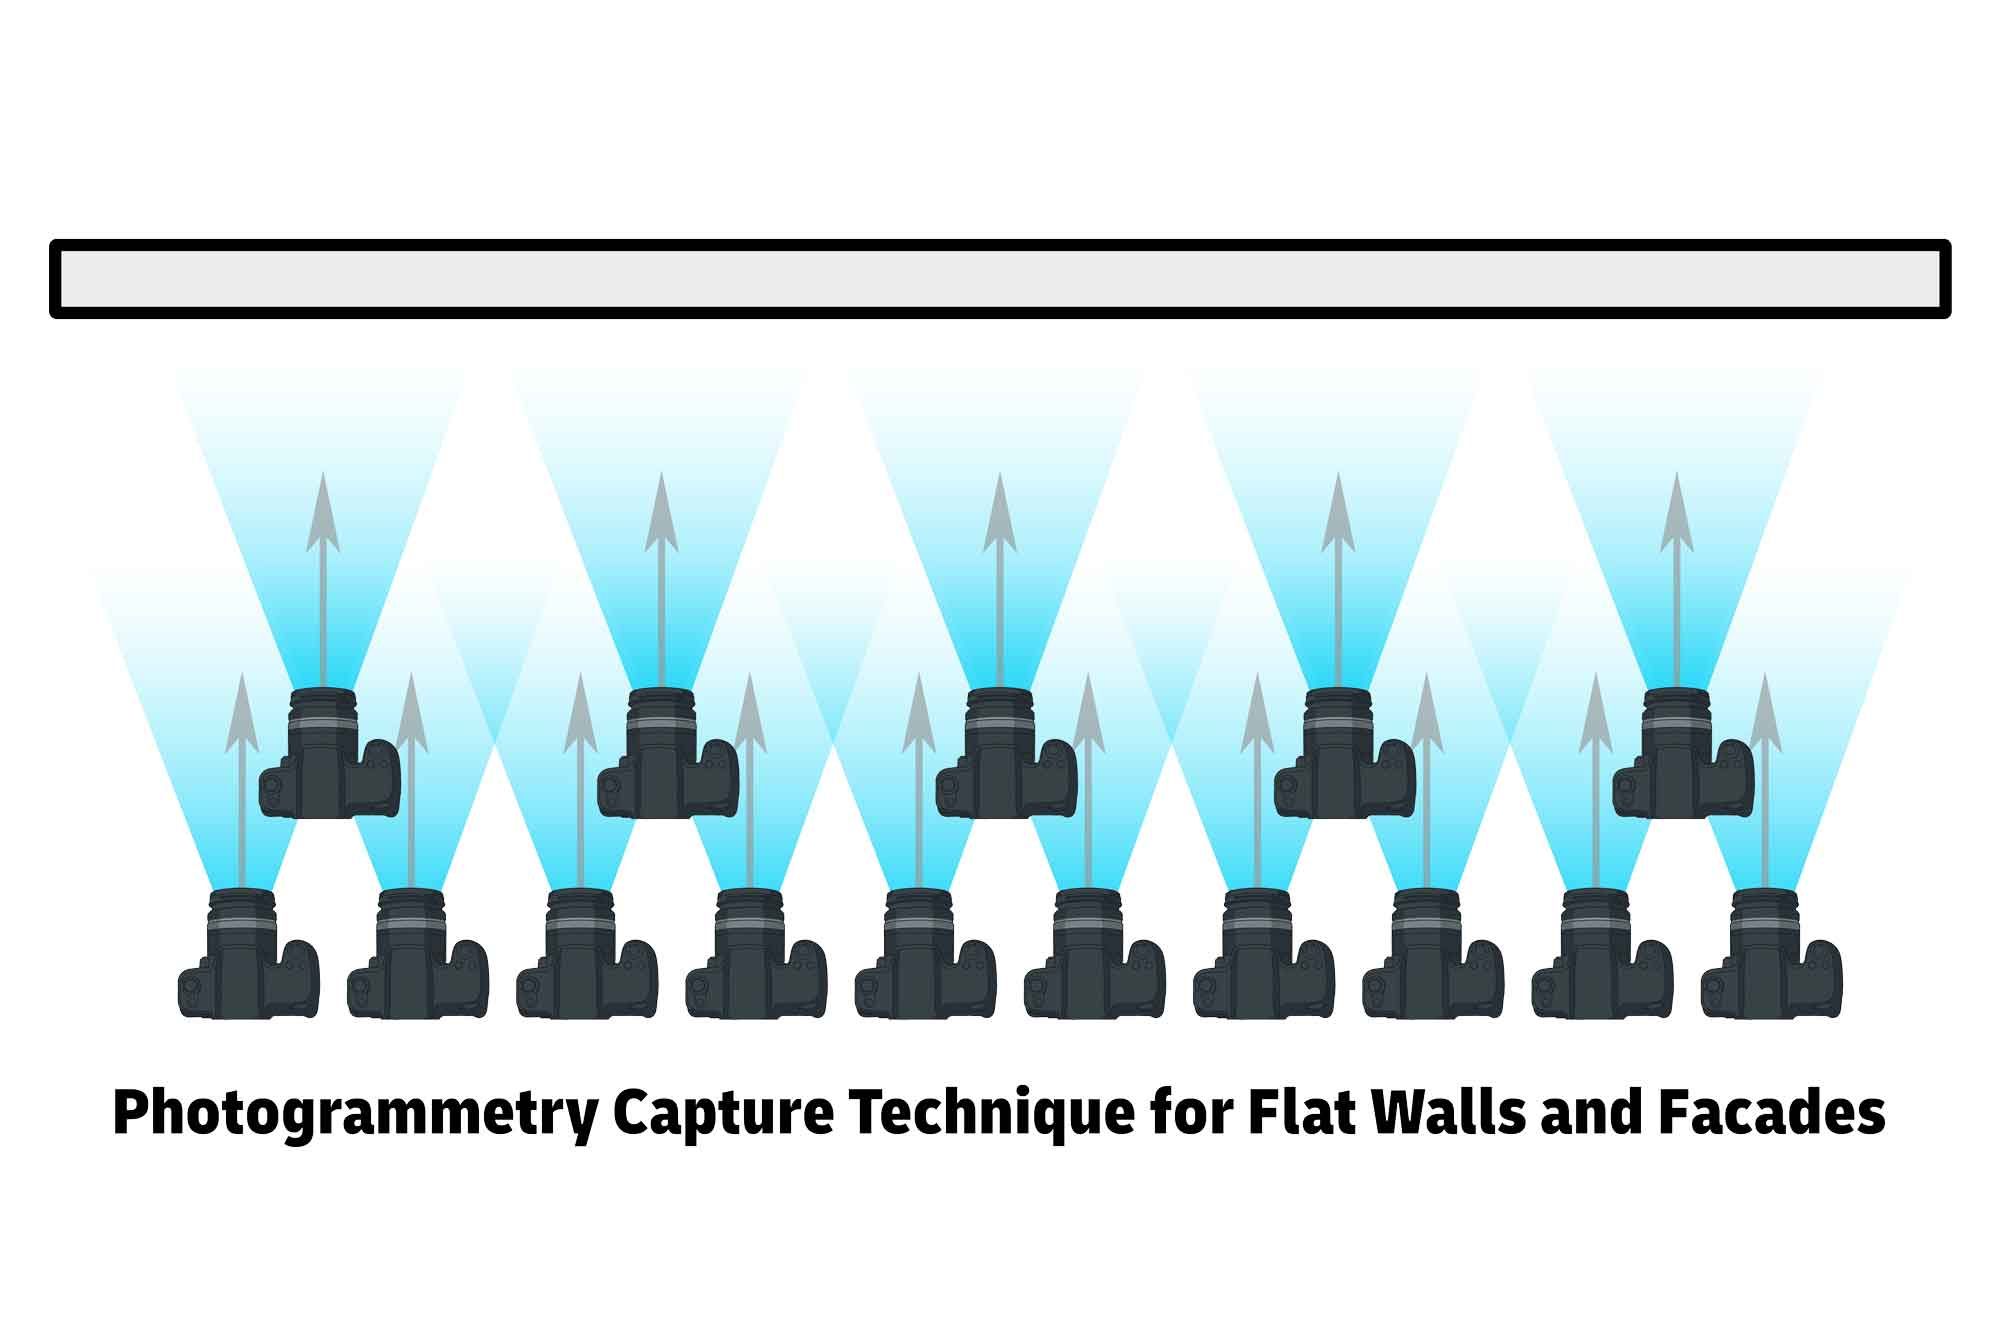
Keep the camera pointed perpendicular to a wall. Make multiple parallel passes at different heights and distances.
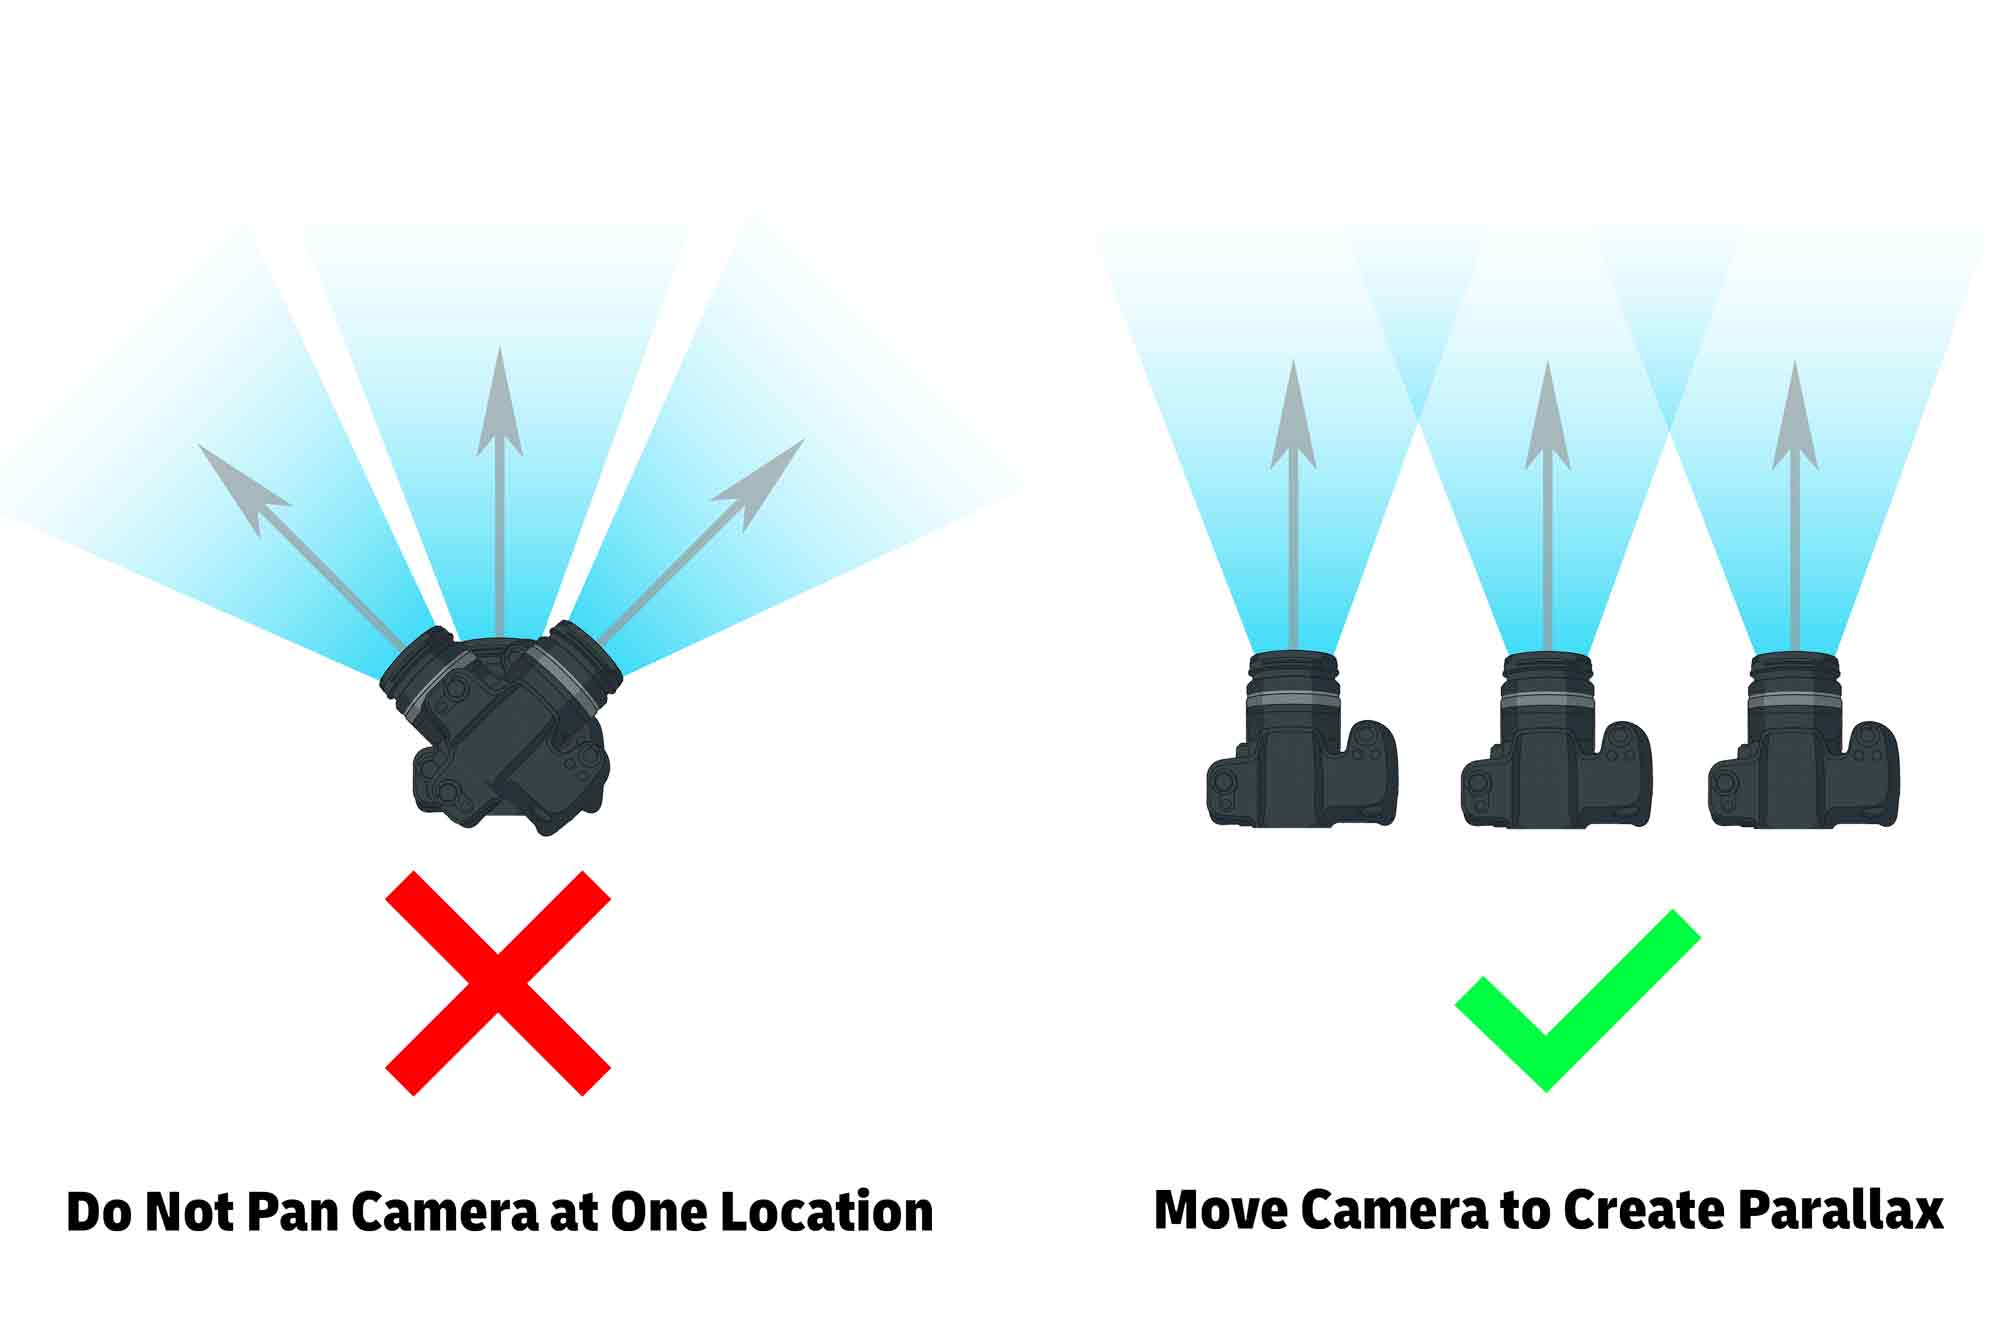
Do not rotate the camera in position, move the camera to the side to create parallax.
Specialized Photogrammetry Equipment
Equipment built specifically for photogrammetry capture can speed up the process and result in extremely high quality scans. Cameras can be controlled by software and automated for repeatable 3d capture of objects. Controlled and consistent lighting give great high resolution texture detail.
Photogrammetry Lightboxes
- Otery 3D Photobench 180
- Ortery 3D Multiarm 1000 - Useful for capturing highly detailed photogrammetry of small objects such as jewelry and small electronics.
Photogrammetry Tutorials
Photogrammetry Software Guides
- Photogrammetry with Photocatch - works with a video or a folder of images
- Epic Games Reality Scan - Convert GLB to OBJ in Blender
Exporting Frames from Video for Use in Photogrammetry
- Export Video Frames with Adobe Media Encoder
- Export Image Sequence from Adobe Premiere
- Export only Keyframes with ffmpeg Video Tutorial
- Export Frames from Video as Images with ffmpeg