p5.js is a fantastic library that combines the power of programming with the beauty of visual art, making it a great choice for artists, designers, educators, and beginners. Let’s dive into the basics of using the p5.js Web Editor and start creating some digital art!
Understanding the p5.js Web Editor Interface
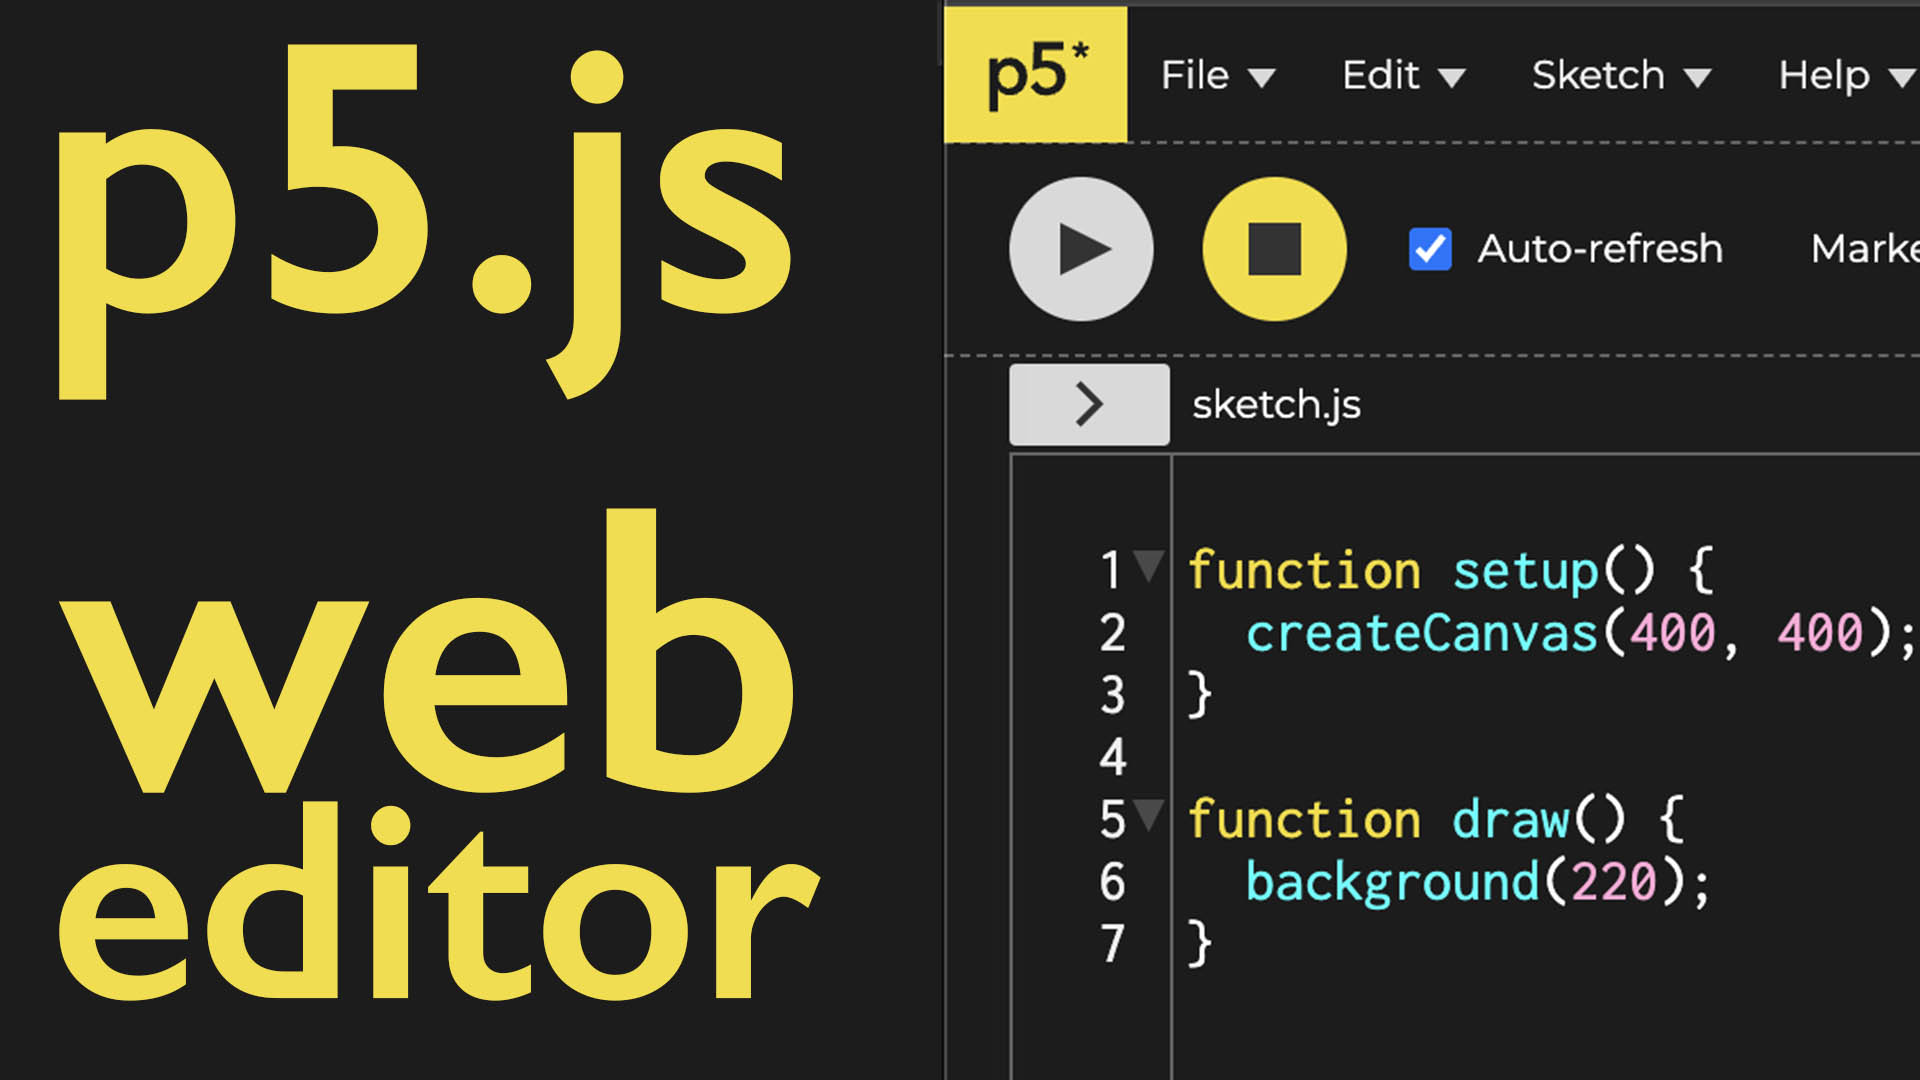
- Canvas Creation: At the heart of p5.js is the canvas. You create it using
createCanvas(400, 400);. This function creates a 400x400 pixel square on your screen, essentially your digital canvas where your art will be rendered. - Background Color: The
background(220);function sets the background color of the canvas. Here, 220 represents a shade of gray. p5.js uses grayscale values where 0 is black and 255 is white. - Running the Sketch: To see your code come to life, click the play button. This will run your sketch and show any changes you’ve made.
- Changing Canvas Size: You can alter the canvas size by changing the parameters of
createCanvas(). For example,createCanvas(300, 400);will make the width 300 pixels. Don’t forget to rerun the sketch to see your changes. - Changing Background Color: Modify the
background()function to change the canvas color. With “Auto Refresh” enabled, changes are updated in real-time.
Drawing Shapes and Responding to Input
- Colors in p5.js: Colors can be defined in different ways. A single number gives a grayscale value, while three numbers specify red, green, and blue (RGB) values. p5.js color modes
- Drawing an Ellipse: Use
ellipse(50, 50, 80, 80);to draw an ellipse. The first two numbers are the x and y coordinates of the center, while the last two are its width and height. - Interactive Elements: Make your art interactive using variables like
mouseXandmouseY, which store the mouse’s current position. You can make the ellipse follow the mouse around the canvas with these. - Exploring p5.js Reference: For more functions and variables, check the comprehensive p5.js reference page. It’s a treasure trove of information and capabilities.
- p5.js Primitive Shapes Tutorial
Saving and Sharing Your Work
- Saving Your Sketch: Log into the p5.js Web Editor and use File > Save.
- Naming Your Sketch: Give your sketch a descriptive name to easily find it later.
- Sharing Your Sketch: Use File > Share to embed, make fullscreen, or share a link to your sketch.
- Drawing Continuously: By moving the
backgroundfunction insidesetup()and usingif (mouseIsPressed), you can create a continuous drawing effect. The canvas won’t clear its previous state, allowing for dynamic, ongoing creations.
Experimenting and Learning
- Experiment: The best way to learn p5.js is by changing parameters, adding shapes, and seeing the effects. Experimentation is key!
- Documentation: Regularly check the p5.js documentation to learn about new functions and features.
p5.js really opens up a world of creative possibilities through programming. It’s a platform where art and code meet, allowing you to express your creativity in unique ways. Enjoy exploring, and happy programming!
P5.js Web Editor Basics Video Transcript
In this programming for artist tutorial I’m going to show you the basics of how to use the p5.js web editor. The p5js web editor is really great because you can get started with creative coding with just a web browser and internet access.
So let’s see what we have here over on the left there is a sketch.jpg. Why do we have a square? Let’s look at the code over here. It says createCanvas 400 400. That means that it’s creating a canvas 400 x 400 but why is it gray? Well there’s a clue here. It says background 220. So we’re going to get into all of these functions later in the course but let’s just start by changing a few numbers. What if I change the first 400 to 300? Well nothing happens. That’s because I need to run the sketch again. So if I press the play button again, suddenly this is now 300 pixels wide and 400 pixels tall.
What if I change background? If I make this 20, again nothing happens. But I can press play and suddenly it becomes black. So this is starting to give us a clue to what these different functions are doing. One nice thing that you can do is click “Auto Refresh”. That way if I type in a number here under background, it automatically changes or if I type in here and I make this 400 x 400 it updates. So over here we have our code and on the right we have preview. So using this “Auto Refresh” check mark can be really great because we can see what’s going on.
So I’m going to walk you through the example on the p5.js website, so we can just see how this might work. So let’s go ahead and add a bit of background color to our image. So I can type in some extra colors and suddenly we have a yellow background. So if you type in a single number for a background in p5.js you get a gray scale. If you type in three numbers you get red, green, blue. So if I type in zero here for the red suddenly it’s going to be very green. I’ll go back, now we have a nice yellow color and underneath this I’m going to type “ellipse(50 , 50, 80, 80);” this example is directly from the p5js website and it’s drawn an ellipse 50 pixels in 50 pixels down 80 by 80. We’ll cover this more in depth but 0,0 is in the top left corner and it counts this way in the X direction and this way in the y direction.
So let’s change a few things. If I make this 80 also suddenly the ellipse moves over. I could also make it have different sizes here if you want to make it more egg shaped. But what’s really great is, if I type in a variable that’s built into p5js .I can type “mouseX” and suddenly now the ellipse follows my mouse if I hover my mouse over the square here and then for the Y value I can type “mouseY” and now the ellipse follows my mouse.
How do I know which ones I can type in? If we look at the reference page of p5js we can see mouseX and mouseY right here. We can also see this other one MouseIsPressed. And if you click on these, you’ll get to see some information and we’ll cover more about this later. Right now we’re just focusing on the web editor, so here I have my web editor program right here and I’m moving the circle around with my mouse. Now how do I save or share this program?
To edit later well what I need need to do is come up here to file and save but I need to be logged in. So if you want to save your sketch you need to log in or sign up. So you can go ahead and click on the login button here and then you can log in with GitHub or log in with Google or you can set up an account with p5.js.
So now that I’m logged in, I can file - save and it gives us a name automatically which is great because it’s better than Untitled, but it’s best to name this so I’ll click up in the top left and I’ll say “editor demo”. So let’s do a few more things to this.
Remember that if mouseIsPressed? So let’s go … Now it seems like it’s the same but now we have an if MouseIsPressed it fills it as black, so it uses fill(0) if the mouse is pressed. But if it’s white that means the mouse isn’t pressed and we can do one more fun thing. We can go ahead and move this background function up under createCanvas and now as I move my mouse around it keeps drawing because it’s not redrawing the background and then I can hold my mouse button down and draw black. Let go of my mouse button, hold the mouse button.
Now let’s say we want to share this sketch with all of our friends? What we can do is we can go to file - save and then we can go to file - share. And there’s a few different ways that you can share. You can embed this in an iframe so you can embed this on your website. You can make it full screen or you can go to the editor. So let’s click on full screen and then right here we have this in the browser. So you can copy this URL and then you can see the sketch as well. I’m going to put this URL in the description of the video.
So hopefully you can use the p5.js Web Editor to start coding in p5.js. Happy programming.