External Power Supply
The GPIO pins on an Arduino are not powerful enough to power more than a couple LEDswithout overloading. To safely and properly power long strips of LEDs, an external power source is needed. This power source should match the DC voltage of the LED strip. For example, a 5V LED strip needs a 5V power source. LED strips commonly come in 5V, 12V and 24V versions. The input voltage should be clearly written on the strip.
Enough current needs to be supplied for the entire run of LEDs otherwise they will either not reach their full brightness level or not light up at all.
Capacitor to Smooth Power Supply
Since a long strip of LEDs can use a lot of current all at once, it is helpful to have a smoothing capacitor close to the start of the LED strip. This capacitor should be connected across positive and ground. The Adafruit “Best Practices” guide for their NeoPixel branded LED strips recommends a 500-1000 µF capacitor rated 6.3V or higher for 5V LED Strips.1 Sparkfun’s LED Strip Guide recommends a 100-1000 µF capacitor. 2
Resistor Between Arduino GPIO and LED Strip Data
To protect the Arduino it is recommended to have a resistor between the the data connection on the LED strip and the wire going to the Arduino GPIO pin. This resistor should be as close as possible to the LED strip. Sparkfun’s LED Strip Guide recommends an 220 - 470 ohm resistor and Adafruit’s Guide recommends 300 - 500 ohm resistor. 2 1
Voltage Drop
Long LED strips can suffer from voltage drop. A general rule of thumb is that additional power needs to be added every 5 meters. LED strips often have a second set of positive + and negative - wires at one end for this purpose. To help avoid voltage drop, keep wires from the power supply to the LED strip as short as possible.
Connect All GND wires
In a DC voltage system, different voltages can be present but for signals and other logic to work properly, all of the GND or 0V wires need to be connected. If you have a 12V LED strip with a 12V power supply controlled by a pin on an Arduino that is receiving 9V power through its barrel jack, then the negative - (GND) of the 12V power supply and the negative - (GND) of the Arduino power supply. This can be done through the Arduino’s GND pins.
If the GNDs are not connected then there is not a consistent reference for 0 volts and the signals will not work properly. This is a common error connecting addressable LEDs to microcontrollers. Everything seems to be connected properly, the LEDs light up, but everything flickers randomly. This usually means that the GNDs are not properly connected.
Cutting Strips to Length
LED strips can be cut to length at specific points. Cheaper strips have less points that can be cut so are a bit less adjustable. Better strips have more points that are cuttable and the best are cuttable at each LED. There are exposed copper solder pads at cut points. It is important to cut the strip precisely in the middle of the solder pads so there is a solid point to solder new wires to on each side.
Once cut then tin the solder pads by adding a bit of solder to each one. Then tin the wires that you plan to connect to the strip. Once both pieces are tinned then it is easier to solder them together. This avoid overheating the fragile LED strip.
Strip LED Wiring Example
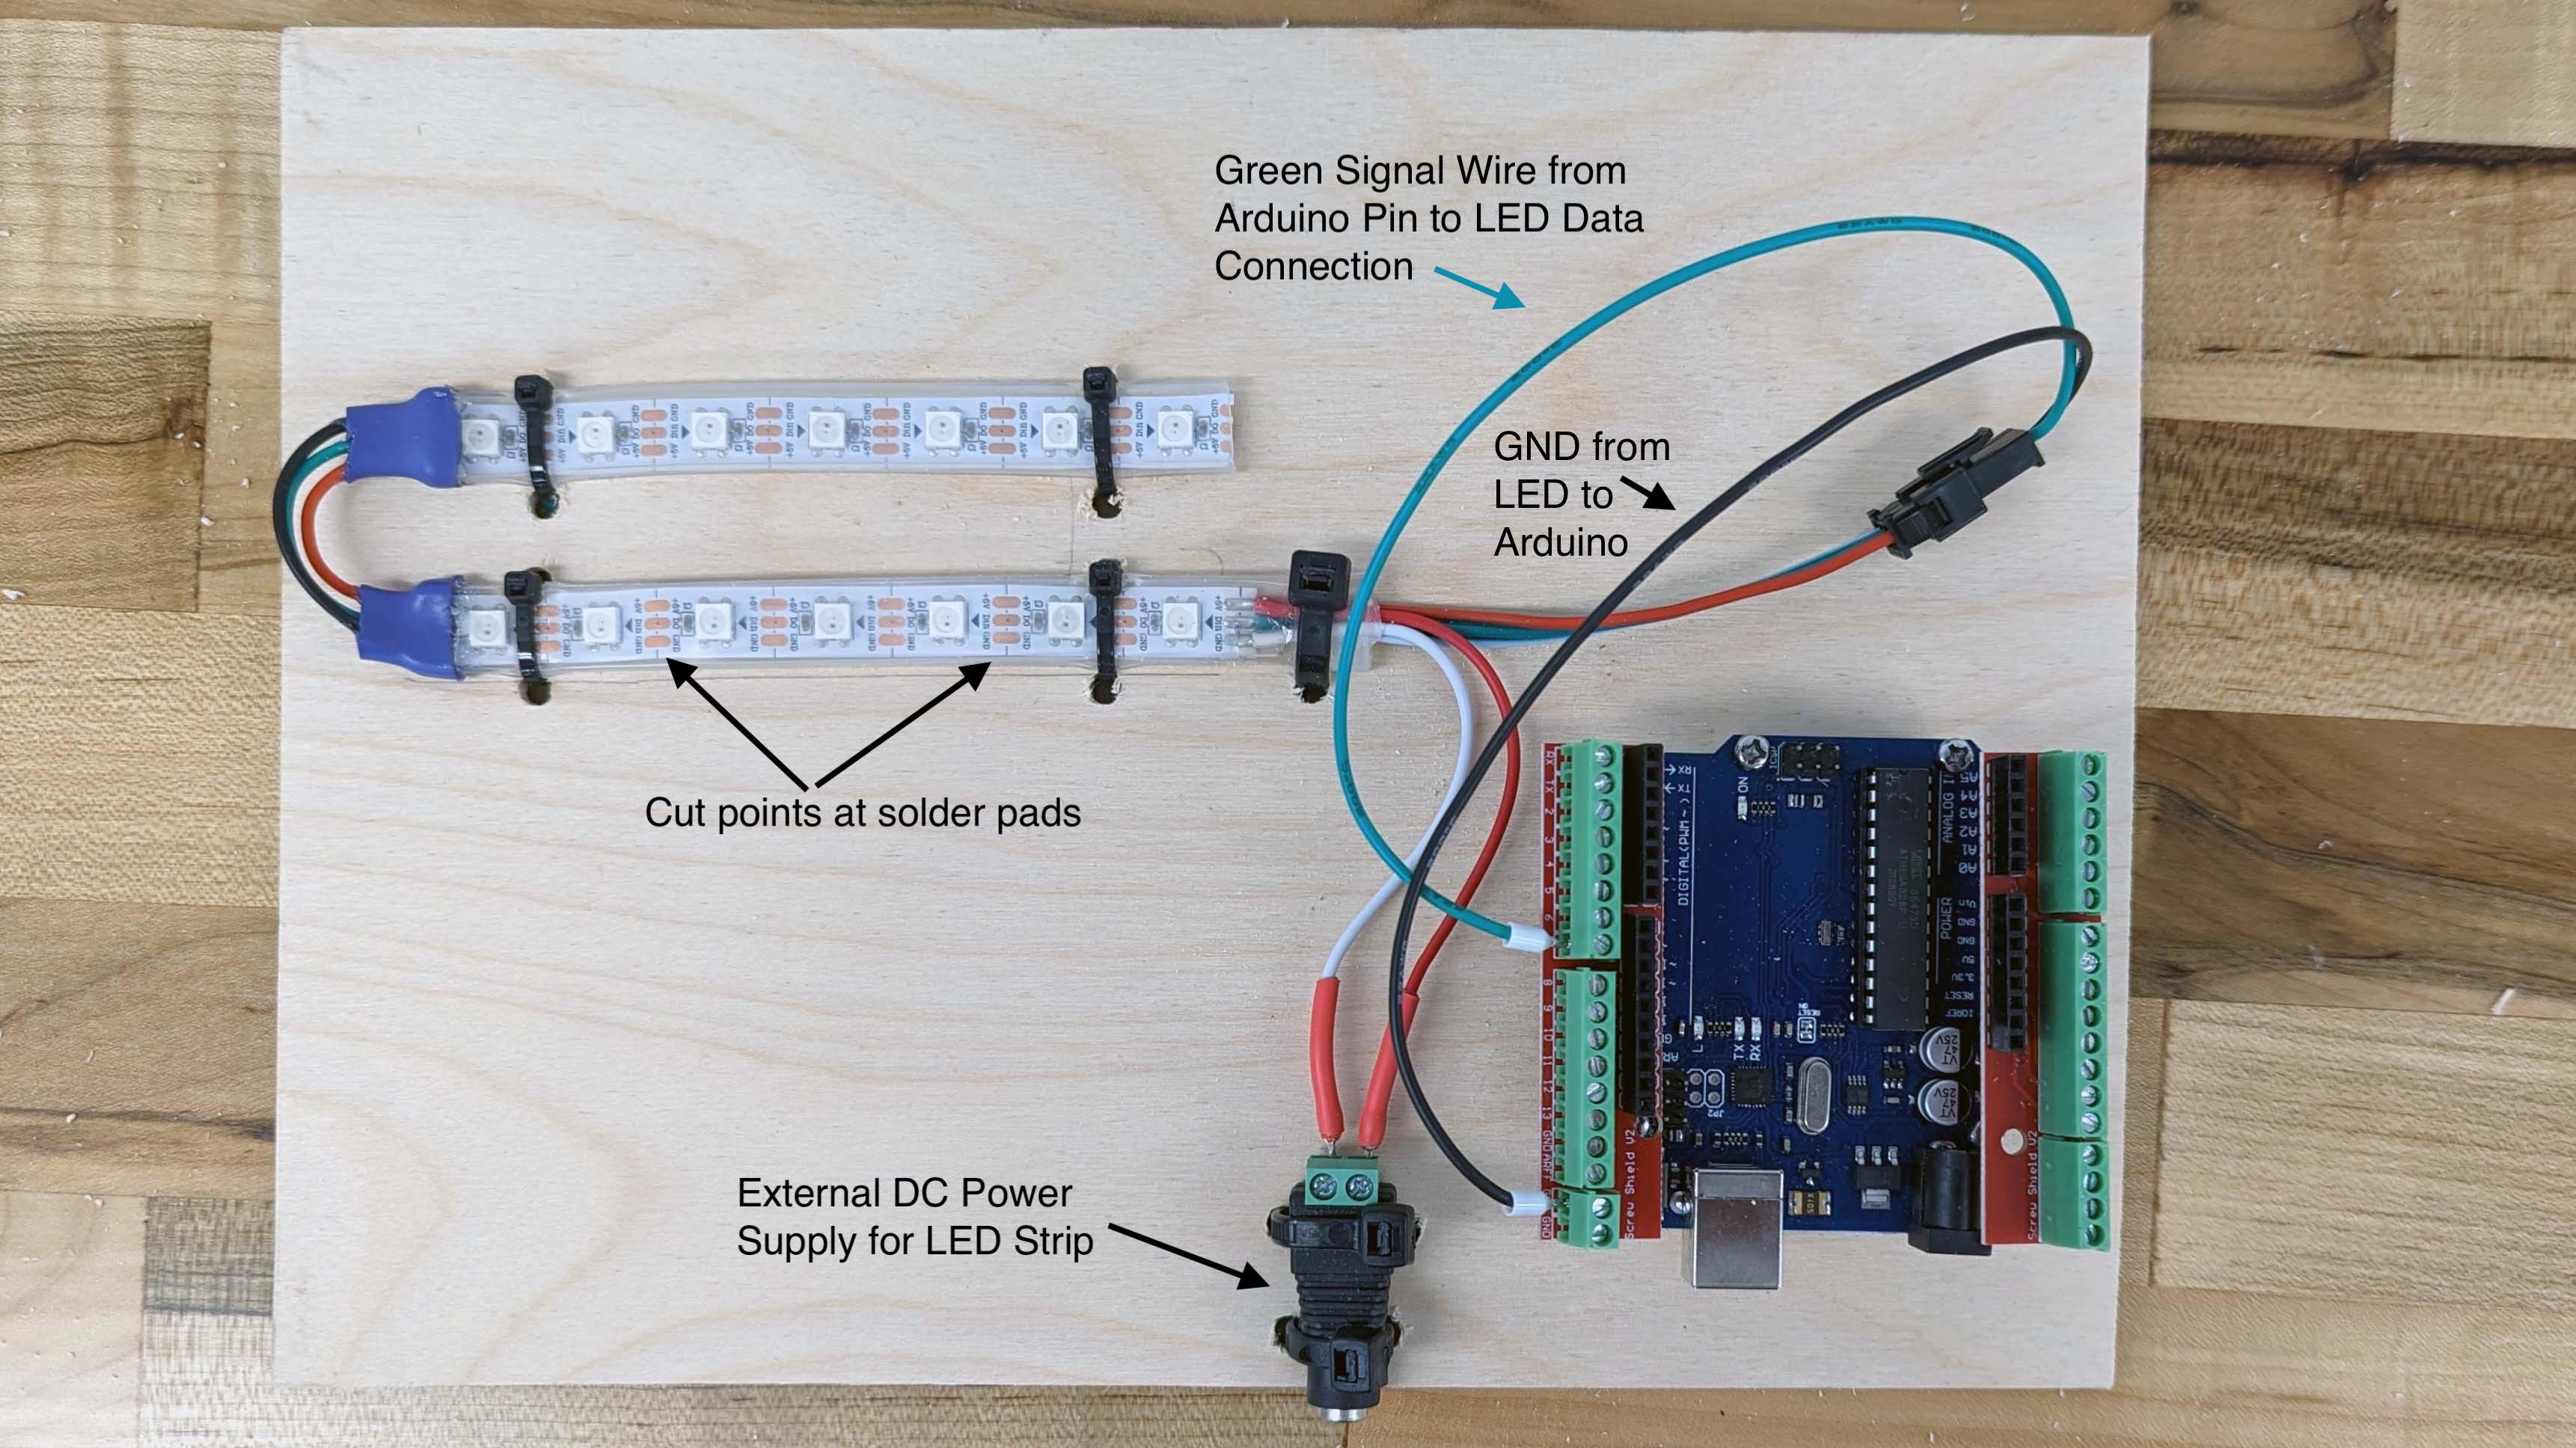
Example wiring of and RGB LED strip to an Arduino
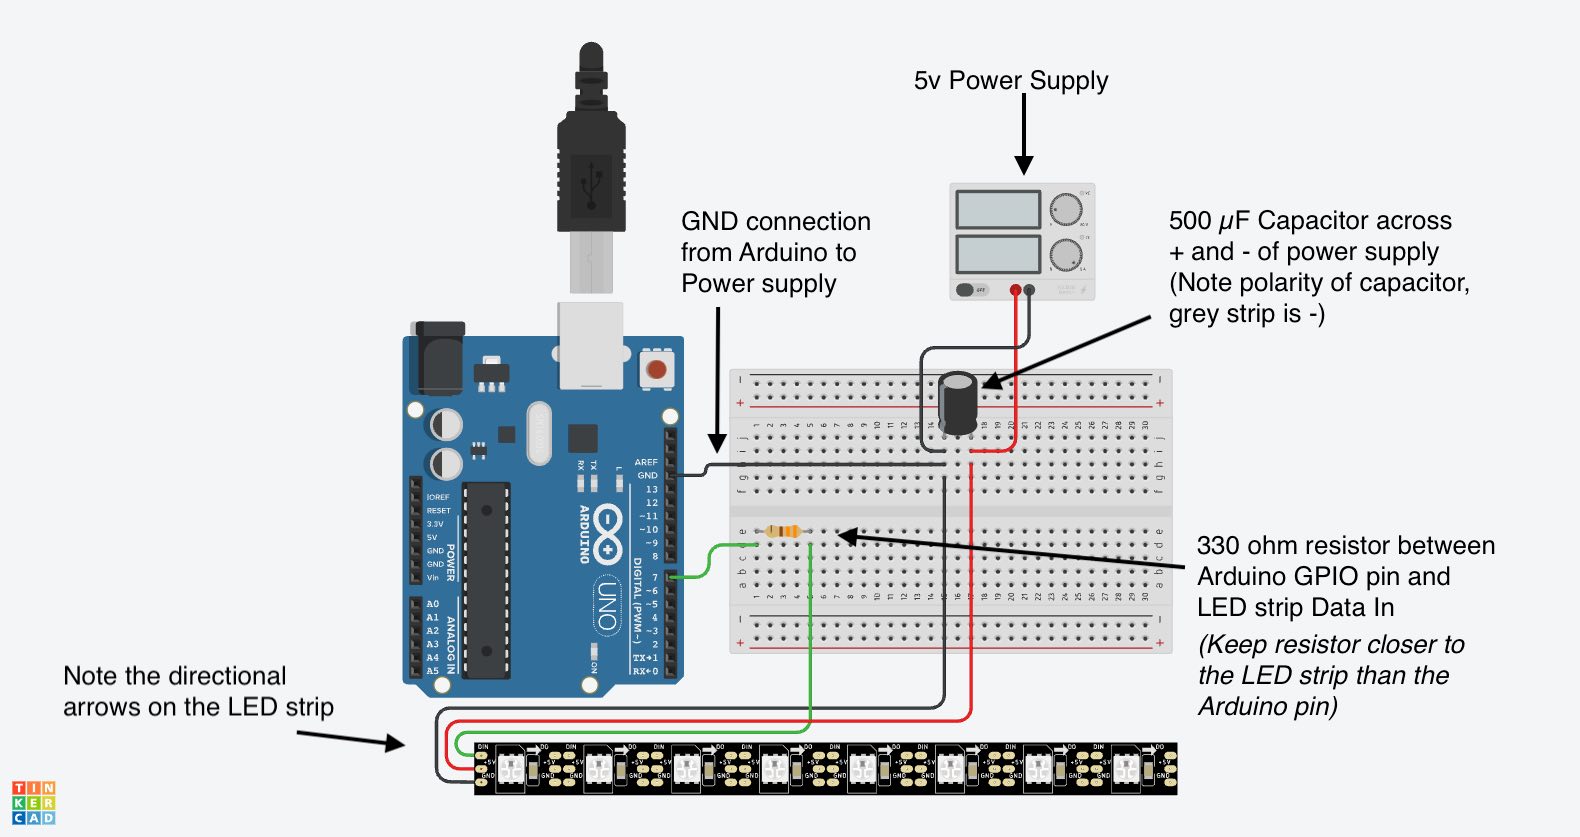
Example wiring of and RGB LED strip to an Arduino with a 330 ohm Resistor and 500 µF Capacitor