The first step to removing unecessary delay(); from Arduino programs is to make a project with an LED that can blink without a delay(); function. That example can be extended to add a button that works to debounce without delay();
The servo examples from the Arduino documentation, sweep and knob, both use delay();. This section shows how to remove the delay from the knob example but could be applied to sweep as well by following the principles of how to remove delay(); from an Arduino sketch instructions.
Wrap the Task in a Millisecond Timer
This sketch simply takes the servo knob example from Arduino and wraps it inside the millisecond timer function from blink without delay. 1 For simple functions and timers this will work to replace delay for most sketches.
Now that the micro controller is not blocked by the delay(); other separate tasks such as playing a sound, reading a sensor (like a button), flashing an LED can happen on their own timers.
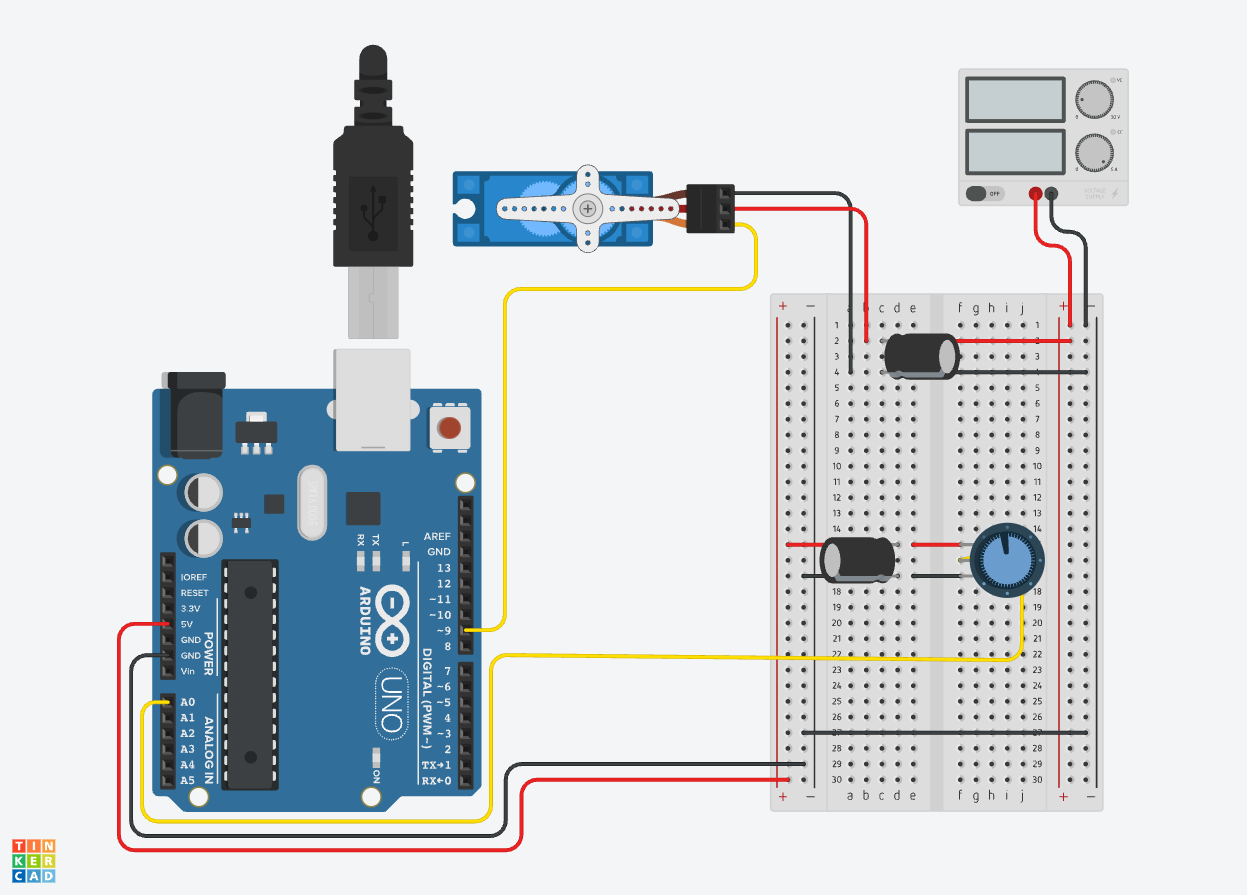
Servo Knob Without Delay Circuit
Servo Know without Delay Sketch
#include <Servo.h>

unsigned long previousMillis = 0;  // will store last time servo was updated

// constants won't change:
const long interval = 15;  // interval at which to update servo (milliseconds)


Servo myservo;  // create servo object to control a servo

int potpin = 0;  // analog pin used to connect the potentiometer
int val;    // variable to read the value from the analog pin

void setup() {
  myservo.attach(9);  // attaches the servo on pin 9 to the servo object
}

void loop() {
  unsigned long currentMillis = millis();


if (currentMillis - previousMillis >= interval) {

    previousMillis = currentMillis;      // save the last time you wrote to the servo

    val = analogRead(potpin);            // reads the value of the potentiometer (value between 0 and 1023)
    val = map(val, 0, 1023, 0, 180);     // scale it to use it with the servo (value between 0 and 180)
    myservo.write(val);                  // sets the servo position according to the scaled value
    }

}
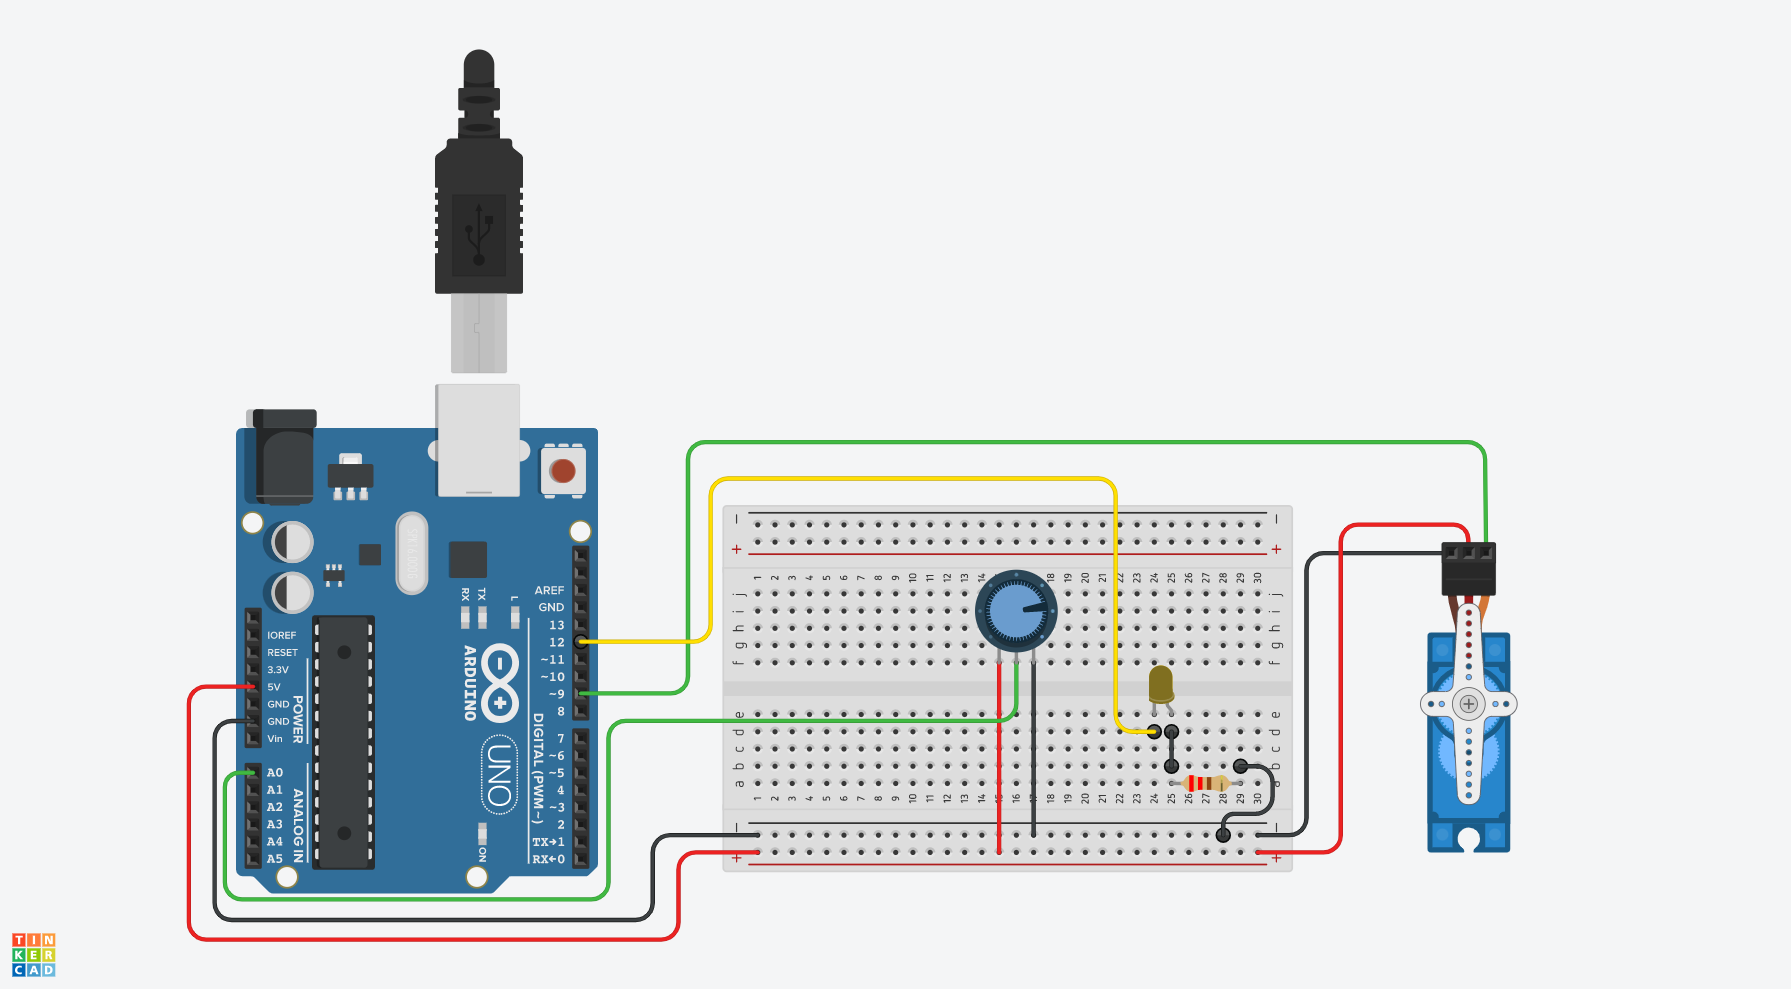
Add a Blink Without Delay LED
Example Circuit Adding a Blinking LED
Example Code With Blinking LED and Servo
#include <Servo.h>

unsigned long previousMillis = 0;  // will store last time servo was updated
unsigned long LEDpreviousMillis = 0;  // will store last time servo was updated

// constants won't change:
const long interval = 15;  // interval at which to update servo (milliseconds)
const long LEDinterval = 1000;  // interval at which to update servo (milliseconds)

const int potpin = 0;  // analog pin used to connect the potentiometer
const int ledPin = 13;  // Set LED Pin to 13

Servo myservo;  // create servo object to control a servo

// variables will change
int val;    // variable to read the value from the analog pin
int ledState = LOW;  // ledState used to set the LED

void setup() {
  myservo.attach(9);  // attaches the servo on pin 9 to the servo object
  pinMode(ledPin, OUTPUT); // sets LED pin as output
}

void loop() {
  unsigned long currentMillis = millis(); // update to current time in milliseconds

// Servo Timer If Conditional
  if (currentMillis - previousMillis >= interval) {

    previousMillis = currentMillis;      // save the last time you wrote to the servo

    val = analogRead(potpin);            // reads the value of the potentiometer (value between 0 and 1023)
    val = map(val, 0, 1023, 0, 180);     // scale it to use it with the servo (value between 0 and 180)
    myservo.write(val);                  // sets the servo position according to the scaled value
    }


// LED Timer If Conditional
  if (currentMillis - LEDpreviousMillis >= LEDinterval) {
    // save the last time you blinked the LED
    LEDpreviousMillis = currentMillis;

    // if the LED is off turn it on and vice-versa:
    if (ledState == LOW) {
      ledState = HIGH;
    } else {
      ledState = LOW;
    }
    // set the LED with the ledState of the variable:
    digitalWrite(ledPin, ledState);
  }
}

